Friday, September 7, 2018

How to Spruce up a Pair of Rain Boots


It's been raining a lot recently. So, I thought that this would be a good project idea! This is a good temporary project because after a few wears, the vinyl begins to rip and fold. This is also a beginner project and very easy for anyone to do! So, let's get started!
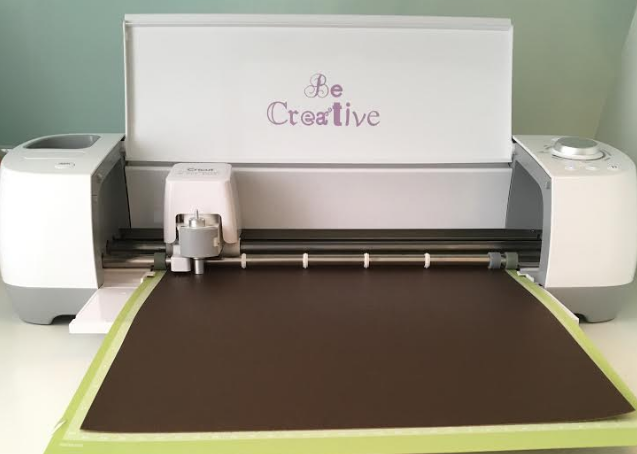
  1. I started off creating and cutting my design out using my Cricut Machine!
  2. Once my design was cut out, I began to weed my design!
  3. Once my designs were weeded, I put transfer paper over the design to make it easier to transfer the design to the boots!
  4. Next, I cleaned off the surface of the boots that I was going to place my design on with window cleaner!
  5. Finally, I transferred my design over to the boots!
I love how these rain boots turned out! Check back in again whenever I post my next project! 

Friday, August 10, 2018

Making Dog Bandannas

I love making things for my dog! So, when I thought of this project, I knew I had to make it! This project is perfect for any pets! So, let's get started!
  1. First, I began with the bandanna part! Which, has a couple steps:
    1. When I first started off, I had to make the bandanna shorter. So, I folded two corners that were straight across from each other and sewed along the ends of the two sides.                               
    2. Next, I folded the bandanna in half creating a semi-triangle.      
    3. Once I measured the collar that I would be using, I added three-quarters of an inch, for wiggle room and pinned 1 and 3/4 of an inch in from the fold.
    4. Next, I sewed a straight line following the pins.
  2. Next, I created my design and began cutting it out.
  3. Finally, I weeded my design and transferred it using my heat press.
To use the bandanna, I 'threaded' the collar through the top part of the bandanna where it's folded in half!

I love how this project turned out! Make sure you check back in two weeks from now for a new post!

Friday, July 27, 2018

3-D Box Wall Decor

I haven't done a lot of paper projects on this blog and I thought it might be time to do another project! I love how this project turned out so, let's get started!
  1. First I created the design. You can watch how I created the design in the video below! I used the lid part of the Cube Box from the Cricut Images.                                                                                                             
  2. Next, I began to score, draw, and cut my design!
  3. Then, I began to fold along the scored lines.
  4. Next, I glued and taped the boxes!
  5. Once all the glue was dry on the boxes, I began hanging them up on my wall using the Small 3M Hooks!
I absolutely love how this project turned out! I hope to do more paper projects in the future! Make sure you check back in on August 10th!

Friday, July 13, 2018

Paper Organization

If you don't know, I have a small work space for my Cricut. So, I try to find the best ways to organize all my supplies for my Cricut! I've just finished all my organization for my paper! So, let's get started!

When you first look at the box you get this view! I love using the Iris Portable Project Case to store my paper and vinyl!
When you open the case up you see some of my paper! I've done some organization and split the paper up into groups, which you can see in the picture below!
If you want to see how I created the labels you can look down below!
I created the dividers by cutting 4"x12" slips of paper and folded them in half. Once I was done folding all the slips, I began to create the labels for each section and cut it out in vinyl. Finally, I transferred all the vinyl labels to the slips of paper!

I hope this has given you a little idea or some help for your organization! Make sure you check back in for a new post on July 27th!

Friday, June 29, 2018

Faux Leather Chevron Bracelet


I've been doing a lot of projects recently that work with the Cricut Faux Leather! I absolutely love working with the faux leather so, I have yet another project for you so let's get started!
  1. First, I began creating the bracelet design which you can watch me create it in the Cricut Design Space on the mobile app in the video below. Towards the end, when I was designing the bracelet I measured my wrist so the bracelet would fit.
  2. Next, I began to cut out the bracelet design into the Cricut Faux Leather.
  3. Finally, I began connecting all the pieces together!

I love the results of this project! If you want to see another post like this, go check out the Faux Leather Tassel Necklace post that I did a couple weeks ago! Make sure you check back in again in two weeks for a new post!

Friday, June 15, 2018

Faux Leather Chevron Necklace


I've been using the Cricut Faux Leather a lot recently. I have yet another post for you, so let's get started!

  1. First I began off with creating and editing my design.The template that I began with was from the Cricut Images and you can find it by searching 'Arrow'. 
  2. Next, I began cutting out my design.
  3. Once all the layers were cut out, I began working on the necklace chain. I split the necklace in half using my jewelry pliers.
  4. Finally, I started connecting all the pieces together.
I love how this necklace turned out! If you want to see another post similar to this one, Click Here! Just a reminder, I've started to post every-other-week.

Friday, June 1, 2018

Faux Leather Tassel Necklace


If you haven't seen my resent posts, I've been in love with the Cricut Faux Leather! So, I have another post that has to do with the Cricut Faux Leather and I absolutely love the idea of it!

  1. Begin by cutting out the tassel part of the necklace. You can check out my blog post from last week, Faux Leather Tassel to learn more about making it and all the information for it!                                   
  2. Once I started gluing together the tassel part, I created the cut-out design for the blank. I began cut out two blanks so I could glue them back to back.
  3. Next, I cut out the designs that I wanted with heat transfer vinyl and transferred them to the blanks.
  4. Finally, I began connecting each pieces together!
I love how this project turned out! After this post, I'm going to start posting every-other week. So with that said, check back in two weeks from now!

Friday, May 25, 2018

Faux Leather Tassel


I've been loving working with the Cricut Faux Leather! I have another project ready for you! So, let's get started!
  1. Use the free template in the Cricut Projects Area. The title is of the project on Cricut is Leather Tassel Keychain. If you aren't able to use the template, try to make a similar design.
  2. Cut out the design.
  3. Start putting the piece together! Begin with the band that wraps around the keychain. Wrap it around the keychain and put a little dot of glue for where you are going to be placing the edge and place the edge down. Let dry.
  4. Begin wrapping the main tassel part around. I recommend that you apply glue to a section, wrap the section and let it dry and continue until you are all done wrapping the tassel.
  5. Add any decorations or add-ons that you want and let fully dry! 
I love how the tassel turned out! If you want to see another project like this, go check out Faux Leather Keychain from last week! Make sure you check back in next week for a new post!

Friday, May 18, 2018

Faux Leather Keychain


If you didn't know, I just recently bought the Cricut Faux Leather! I absolutely love working with it! Today I have a new project that will somewhat take part in the post for next week! So, let's get started!

  1. Begin with creating your design. Leave an area to wrap around your keychain. I just used an "R", duplicated it, flipped it, added a rectangle and welded it all together. 
  2. Next, cut out your design. Make sure it is on the Faux-Leather setting when cutting.
  3. Stick the design partially through the keychain.
  4. Apply the glue to the design asides from the middle section.
  5. Leave to dry.
I hope you've enjoyed this post and make sure to come back next week for a new post!

Friday, May 11, 2018

Making a Simple Faux Leather Bracelet


Last week I ordered a pack of the Cricut Faux Leather! I was extremely excited to receive the package. As soon as I got it, I knew straight away what project I was going to do! The very first design that I put together would have been a really cute bracelet but I tried cutting it out twice and it didn't work out very well. I learned you can't do an intricate design with this faux leather. So, I created a different design. I only used the shapes provided in the Cricut design space and I used the welding tool in the design space to create my design. So, Let's get started!
  1. Measure your wrist using the measuring tape. This is so you know how long you need to make your bands.
  2. Create the design that you want for your bracelet and make sure you make the length of the bracelet the length of your wrist and leave about a quarter of an inch for extra space. When I created the design, I added little circles at the end of each piece so I could put the jump rings through!
  3. Cut out your design. Make sure you put the setting on the Cricut Faux Leather. The main thing that I don't like about the Cricut Faux Leather is the setting that you have to use for cutting because it goes over the design twice and there's no way you can change it.
  4. Next, since you can't cut out an intricate design with the faux leather, I cut out heat transfer vinyl to create my design.
  5. Iron your heat transfer vinyl onto the faux leather. I was a little worried about this part because I wasn't quite sure if the heat was going to melt the faux leather.
  6. Finally, I started to connect the bracelet with jump rings!
I absolutely love the result of the project! If you want to see another post that includes faux leather go check out my post from a couple weeks ago, Faux Leather Flip Flops. Make sure you check back in next week for a new post!